
TOOLS & MATERIALS:
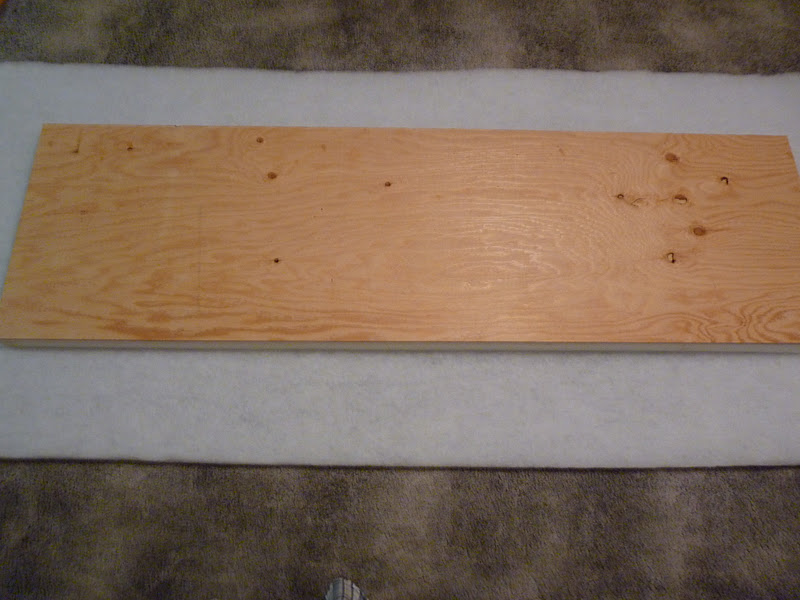
- 1/2 inch sheet of plywood cut to size (width of bed x desired height)
- 2 inch thick piece of dense foam cut to size of plywood
- Quilt batting (enough to wrap around plywood and foam)
- Desired fabric (enough to wrap around plywood, foam and quilt batting - fabric with a bit of sheen looks best, but has to be thick/strong enough to handle the upholstering process)
- 1x6 piece of lumber (at least 6 feet long)
- 2 inch long wood screws
- 2 inch long anchoring wood nails
- Staple gun and staples
- Measuring tape / ruler
- 4, 1/4 inch thick by 2 inch long bolts with wing-nuts
- Fabric scissors
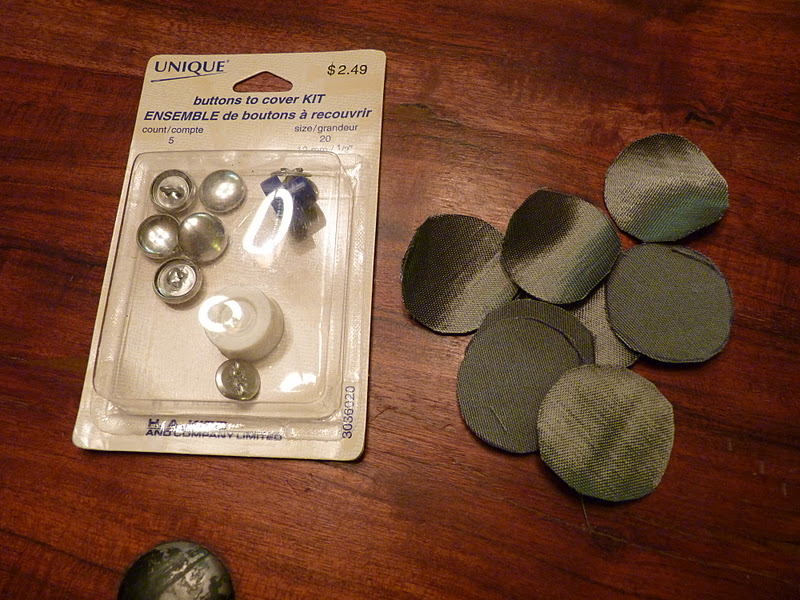
- Fabric covered button kit and buttons
- Drill
- Screwdriver
- Hammer
- Nail punch
- Fabric marking pen
PROCEDURE:
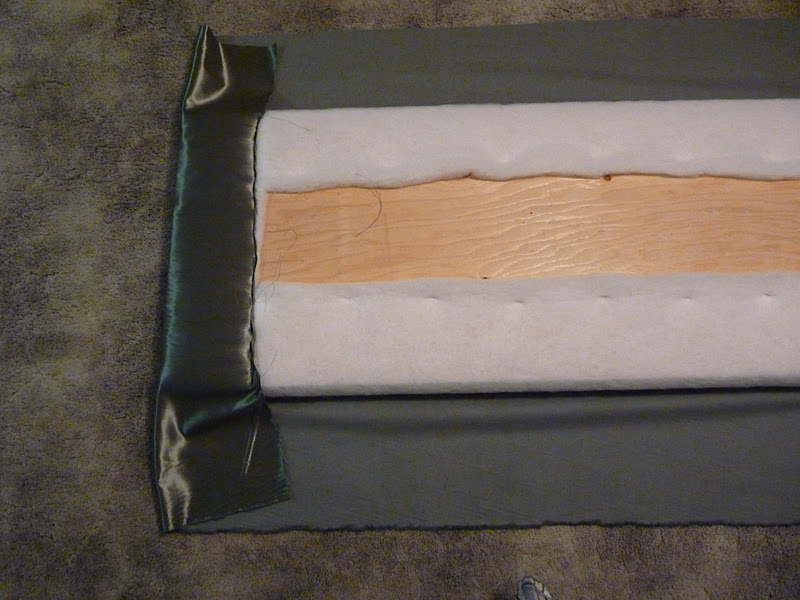
Step 1: Cut quilt batting to be about six inches longer on all sides than your cut plywood. Lay out quilt batting on a clean, flat surface (probably floor). Place foam in center of quilt batting, place plywood on top of foam. Ensure everything's properly aligned, then firmly pull quilt batting around to the back of the plywood and tack in place with a staple gun around all edges.


*Tip*
To avoid extra bunchiness around the corners, cut a square out of the quilt batting at each of the corners (an inch or so from the plywood) before folding the corners in and tacking in place.


When finished, foam should be securely fastened to the plywood by the quilt-batting:

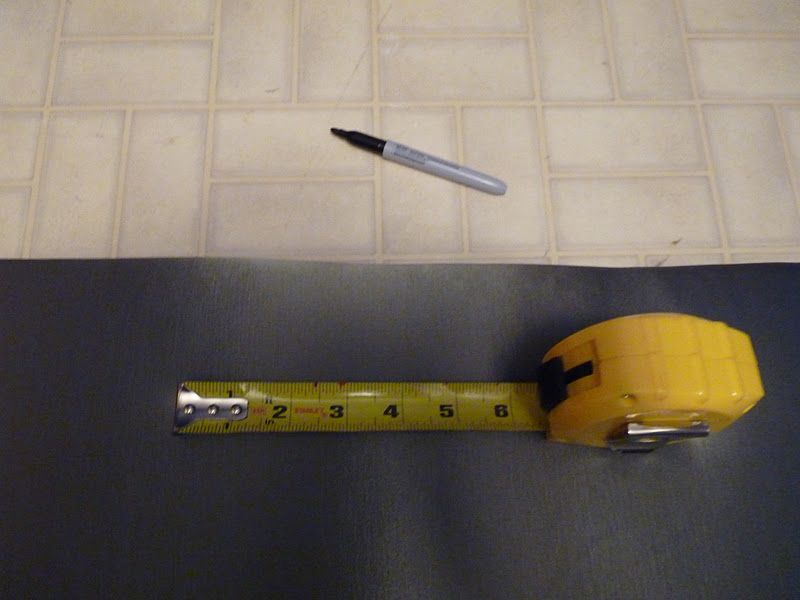
Step 2: Cut fabric to size (larger than your piece of quilt batting by about an inch or so), iron, and place on a clean flat surface (probably floor), right side down. Place padded plywood in center of fabric, padded side down. As with the quilt batting, cut out corners and firmly pull fabric around to the back of the plywood and secure entire length of edges with staple gun. Carefully fold in and tack corners as neatly as possible.


You really want to pull this as tightly as you can, so that the right-side surface of the headboard will be as smooth and taunt as possible:

Step 3: Figure out the desired spacing of your tufts by dividing the length and width of your headboard with the number of tufts you wish to have. Make sure you have it measured correctly so that tufted pattern will be equally distributed across the headboard. Configure your tufted pattern (should look like a 4 point diamond) on paper, and then carefully measure and mark pattern onto the right side of your headboard.
*Tip*
Take your time with this - make your mistakes on paper, and don't mark fabric until you are positive about what you need to do.

Step 4: Beginning with the middle row working out, place an anchoring nail at each marked point, and secure nail to plywood with hammer, sink in with a nail punch - be careful not to sink the nail in too far, or it will go through the plywood.


Step 5: Cover enough buttons of desired size with fabric to cover each nail-head in each tuft. Secure buttons to nail heads in tufts with a strong adhesive.
 | ||
| My first go with this I attempted to use hot-glue because it sets quickly, but I would probably reccommend something stronger. |
To extend the life and look of your headboard you may want at this point to treat it with Scotch Guard or another fabric protectant. Test on a sample of fabric before hand, and follow the instructions on the can.
Step 6: Cut 1x6 piece of lumber into 2 lengths of desired height for headboard (about 3ft high). Measure and mark where to drill appropriate 1/4" holes which will be used with bolts and wing nuts to secure head-board to bed-rail. Drill holes.
Step 7: Measure and mark where the top of the 1x6 length will be fastened to the headboard. Drill about 6 holes. Place 1x6 lengths on either side of the head board (according to measurments in order to make it fit with your bed-rail) and secure tops to back of headboard with wood screws where you drilled your 6 holes.
Step 8: Position head-board on bed, and tightly secure bottom of 1x6s to bed-rail with 1/4" bolts and wing nuts where your 1/4" holes are drilled. Enjoy!

You might also be interested in:
 |
| How to Re-Upholster Furniture with Deep Folded Tufts |
This is amazing u made it look so easy thankyou for sharing xxx
ReplyDeleteSo smart with the nails. Definitely pinning this.
ReplyDeleteI want to make this so badly now. Would you mind giving an estimate to how much it costs, total? The hubby is going to want to know before I can start anything... :P
ReplyDeletethis looks amazing. my husband and i are making a head board after christmas... can't wait!!!
ReplyDeleteANGELA - it really depends on the cost of your foam and your fabric. This particular headboard cost $184 in materials.
ReplyDeleteHey, thank you so much for this tutorial! I found it on Google after I made a headboard myself (you can see the headboard in my blog)and I want to tuft it. But every other tutorial was so complicated where you actually had to make the holes prior to covering, sewing the buttons through, etc. I love your tutorial because it's so much easier and you can do it after you have upholstered the headboard! :)) Will definitely try it on my headboard.
ReplyDeleteIs it comfortable to lean against for reading with the nails slightly protruding like that? Have any of your buttons come off from to much pressure while leaning against them?
ReplyDeleteAlso, I love the fabric you used, is it a silk? Or a poly blend? I'm trying to find a wide width satin in a pebble grey color (I don't think it exists ;)
ReplyDeleteJenwrendez: The nails aren't protruding - they're deep inside the tuft, and the high-density foam cushions the area around the tuft, so you don't feel it all. Initially I started with hot glue for the buttons because it's easy to use and sets quickly, but I did have some issues with some of the buttons coming off which is why I switched to a stronger adhesive. I used Gorilla Glue which worked better, but was a bit of a pain because it expands in size, really should be clamped (very hard to do with this project) and takes hours to set. It worked, but I would still like to find something better . . .
ReplyDeleteThe fabric for this particular board is a thick poly blend, and is actually a lining fabric typically used in dress coats. My client for this project has small children and was concerned about how a high-end, expensive fabric like silk would hold up. This worked great - and we were able to treat it with Scotch Guard as well for extra durability.
what a great tutorial! I always wondered how to tuft with a back board (thought of drilling holes and then threading through). This is genius! I am so making one soon! I'll go a little less maintenance though and use burlap or something less perfect for my first try.
ReplyDeleteCould I use thicker foam maybe 3 or 4 inch and can I make it larger, possibly with a curved top?
ReplyDeletevery nice. i think it might be a little easier to figure out button spacing before while the board is still plain, and mark the places with a marker, drill holes in each spot. then cover. then you can get a big needle and come from the back and string your buttons on strong string and tie it off at the back. the tufts would be created by pulling the buttons through the hole on string. that way you don't have to use nails or glue. just my thought. i am about to make one, just doing some final research before i do. thanks!
ReplyDeleteAbsolutely, that is a better, but slightly more complicated way to make the tufts. If I do this again, I will use this method.
DeleteI've already got most of the materials to make mine using our old headboard. Because it's heavier than plywood I LOVE this idea of using nails rather than drilling holes and sewing the buttons on. I think I'll still figure out my button spacing beforehand, maybe using some graph paper to make pattern?
ReplyDeleteThis is a look I love, and the cost of one from the store has always been out of my budget! Thank you for sharing, found you through pinterest ;) Wonderful work! now a follower!
ReplyDeleteDesde hoy soy tu seguidora, me gusto mucho lo que haces, saludos desde México
ReplyDeletehi,
ReplyDeleteI just really like dealing with wooden created and am always looking for new methods of doing it.I have acquired a lot of details from your website.
MDF Supplier | Veneered MDF
About to make a headboard, have all material. But, I've worked with covered buttons for a duvet and I would recommend those instead of the nails for added wearability. Love your initiative in choice of fabric...pure genious! Having seen such in the past I think it should wear like iron since it's meant to hold up in heavily used apparel. It's a good weight and comes in colors. I'm surprised there wasn't a problem with running out of fabric when turfting...this uses a lot of the top fabric with all the tufting, if you get my drift. Thanks for a well done tutorial and for sharing. We learn from each other.
ReplyDeleteAs an alternative to covered buttons, upholstery nails could be used. They come in many different metal finishes and textures. You might find them at Wal-Mart, Home Depot, Lowes or an upholstery supply business.
ReplyDeleteAnother way to fasten covered buttons would be replace nails with x-small eye screws. Thread button and eye screw with button thread, pull tightly and knot several times, trim thread to not be seen.
(A dab of all purpose glue would work well to keep thread tied tight with ends under the button and out of sight)
I know this is looooooonnnnnnggg after your tutorial posted, but can you tell me what an anchoring wood nail is?? Maybe a picture of one?
ReplyDeleteAn anchoring nail has kind of swirly looking shaft - not as much as a screw - but not smooth like a regular nail.
DeleteI'm curious. It's been a year since you originally posted this. Any thoughts on what you would do differently? How has the fabric held up?
ReplyDeleteI'm getting ready to do a similar tufting project on a canopy and am planning to drill holes through the plywood. The tufts will be held in place by upholstery thread and buttons.
Hi Paige,
DeleteFunny you should ask. The biggest issue that came up with this project over the last year was that the glue I used just wasn`t strong enough to hold many of the buttons, and consequently many of them popped off. To remedy this I took the whole thing apart, drilled holes in the plywood, re-attached the foam and fabric and planned to thread the buttons through the holes I drilled in the plywood with upholstery thread, just as you are planning on doing. Unfortunately, what happened to me was that I was able to push my upholstery needle through the whole works fairly easily from the back-side, but after I threaded the button and went to push the needle back through the front to the back I had tremendous difficulty finding the hole in the plywood. After about 20 unsuccessful attempts on the first button (the first of 109), I realized that this just wasn`t going to work. I considered drilling larger holes, but I didn`t want to go too much bigger, because then I would loose the ability to anchor the thread successfully at the back without it slipping through the large hole. Soooo, I took the whole thing apart again and tufted the fabric to the foam and then attached the works to the plywood. This worked, but, because I was pulling the buttons against the flexible foam as opposed to the rigid plywood, I just wasn`t able to get the fabric as tight, or the tufts as deep. I was less than satisfied with the final result. I liked the nails better. To tuft to the foam better, I really needed something like an industrial quilting frame that could handle the thickness of the foam and hold the whole works taut while I tufted the buttons. I think that would`ve helped to get the fabric tighter, but wouldn`t have necessarily helped to get the tufts deeper. The other thing that I thought might work was creating a hollow wood frame with an internal mesh-work of nylon straps to anchor the buttons to instead of plywood (this is what you`ll see on the backs of tufted couches and other furniture if you open them up, but I wasn`t sure how that would effect the structural integrity of the headboard (I was worried it would reduce the strength and firmness of it), and I also, just wasn`t quite equipt, or up to doing all that work. So in the end, I still like the nailed version better, but I wish I had a more effective adhesive for the buttons.
I'm trying to recreate this for a full size bed, and if I'm successfully maybe king. I was wondering the spacing you used for the buttons and what size the headboard in the picture is.
DeleteThis was a king-size head-board, and the spacing of the buttons was just under 5" apart (4 13/16" to be exact). You'll want to work out the spacing of your tufts specifically to the size of your headboard however.
DeleteDrill your holes bigger and on the back of your plywood use an old 2 (or 4) hole button.
DeleteHello,
ReplyDeleteThe headboard made by you is awesome in look and specially I like the way of describing each and every step of making this headboard is really recommendable.
Thank you..
MDF Board | Veneered MDF
I know I'm late for this party but I need to jump in here since you guys and this problem kept me awake last night. I thought I had a solution but then at about 3 AM I couldn't stand it anymore and started to search YouTube for a solution. http://www.youtube.com/watch?v=NczEyCXfffc(2)
ReplyDeleteMy solution was to use a humongous crochet thing or something homemade with a hook on the end, like a heavy wire (coat hanger (?)about 8" long. Thread a strong cord, 12" or more, through the button, tie the ends making a circle, hold that in front, then push the wire through the back and catch the cord and pull it back through, button and all, staple the cord to the board a few times.You may want to do this with the headboard resting on a couple of saw horses or chairs in a horizontal position, not upright but that's up to you and what you're comfortable with, maybe a helper could hold the button from the front while you push that wire or crochet hook through the back. Let me know what you think of these methods at pettifour@yahoo.com
Tonight I'll sleep better now that I've solved this in my own mind. My project is for warmer weather since I'm going to cut out a different design using wood and foam rubber and think batting. BTW, you can find anything and everything on YouTube. Stay warm!
I think that sounds really good. The only thing I would be concerned about is being able to push the crochet hook through the fabric without causing too much damage to it. Usually they have a pretty blunt end, and you need something sharp to be able to pierce through the fabric.
DeleteWould upholstery nails/tacks work?
ReplyDeleteI think this is genious (and the easy way) and desperately want to NOT have to drill holes, pull buttons through, etc...
Keep trying to rack my brain to find a solution..
*genius
DeleteUnfortunately upholstery nails/tacks are too short to get through the foam and batting (unless you can find some really long ones!)
DeleteI am in need of this fabric...... I have never walked in to a fabric store, what do I ask for when looking for this fabric? I am new to DIY and I really want to try this :)
ReplyDeleteThis exact fabric was hard to find. It's actually a heavy-weight coat lining. You can use pretty much whatever fabric you want - but I would avoid anything with stretch to it, and would recommend using a medium to heavy weight fabric (if it's too thin/light it might tear on you).
DeleteOmg it's so fabulous!!
ReplyDeletePlywood Company in India
Clasp fasteners work as well like they use in folders. Plus they are inexpensive and come in various styles.
ReplyDeleteThis turned out beautiful. I love your blog.thanks for the ideas. BTW this might be overkill but maybe you can use liquid nails for the adhesive.
ReplyDeleteCool completely, Tufted Headboard is so simple and so easy to make :)
ReplyDeleteTufted upholstery adds a rich, luxurious feel to any piece, even a simple head board. Official upholstery techniques for deep tufting can be quite ... tuftedheadboard.blogspot.com
ReplyDeleteThis is simply amazing....
ReplyDeleteMe again, the one who couldn't sleep and got up at 3 AM to check YouTube. OK, that wire idea could (maybe) work but a better solution is a needle with eyes at both ends. I know Joanne's has them, I saw them there last week and probably Hobby Lobby too. They're about 10" long. Sounds like a plan!
ReplyDeleteOk so I am laughing at the fact that you aren't sleeping well. I have always been the same way! I have racked my brains on many occasions! Here might be a solution to this problem. Run 2 pieces of thread/thin cord through the back to the front. Slip your button through one thread and then tie a knot with both threads on the front side. Grab the threads from behind and pull centering your button and the thread knot under the button so as not to be seen. When that is finished and you are holding tightly to the back strings, slip another button over both back threads, one in each button hole and tie off your knot. Hope this helps!
DeleteI have all my materials, going to be creating one of these and hopeful its as gorgeous as yours. I have a slight modification Im making and Im using wax paper, as its heavier and drawing my grid on there for placement of my nails to go in, nailing int the few in the centre first and working my way out from there, so wish me luck, hope this goes as planned and will post as soon as i have some success:)
ReplyDeleteTraditional method (drilled holes): It seems to me that the easiest way would be to stand your board up so you can access both sides. Then thread all your buttons using upholstery thread, pass both ends of the thread through the board from the front, pull and tape down temporarily, preferably with low-tack masking tape. When all buttons are done, lay the board right side down and remove the tapes. Separate the threads so you have one lying upwards and one down all along the middle row. From the center outwards, place small bobby pins (about $1 from the dollar store) between the threads, then tie tightly and knot. Follow with the next row outwards until all done. The little ridges on the bobby pins keep everything from slipping. You will then want to cover the whole back with something like foam core to keep the back from damaging your walls.
ReplyDeleteThe Nail Method: to keep the buttons from falling off, which was your first issue, you must first figure out why the buttons weren't holding. If your buttons were the kind that have a ring in the back through which you pull the thread, such as a jacket button, they might be the problem. What you can do is to snap these off so you have a nice flat back before affixing the buttons. If the problem is that your glue isn't sufficiently strong, try using a permanent glue like Bullgrip or epoxy directly on top of the nails. Use the glue gun to run a circle around that and press the button into place. Hold till you're sure the glue gun glue has set enough to hold. This will ensure that the button will stay in place long enough for the strong glue to cure. Continue all the way through, being careful to position them all straight. Leave lying down overnight. Ta-da!
I am hoping the same best effort from you in the future as well. In fact your creative writing skills has inspired me. prevent headboard bang
ReplyDeleteGood read, This blog has provided the helpful data to us, continue the good work.
ReplyDeleteFabric sofa in UK
Dacă sunteți un om de jocuri de noroc și înțelegeți că trebuie să încercați urgent să jucați la cazinou, atunci eu aici, după ce am evaluat tot ceea ce ne este oferit acum pe piața serviciilor de jocuri de noroc, vă pot spune că preferatul meu este cazinou GGbet https://gg-bet-ro.com
ReplyDeleteDie besten Wettstrategien für erfahrene Wettende. Dies wird Ihnen helfen, besser und klüger zu wetten. Als Ergebnis sollten Sie mehr wetten, öfter gewinnen und letztendlich mehr Spaß haben. Sie können die Vorteile des Casino-Spielsystems nutzen, wenn Sie dies im Ice Casino https://icecasino-at.net/promo-code/
ReplyDelete